

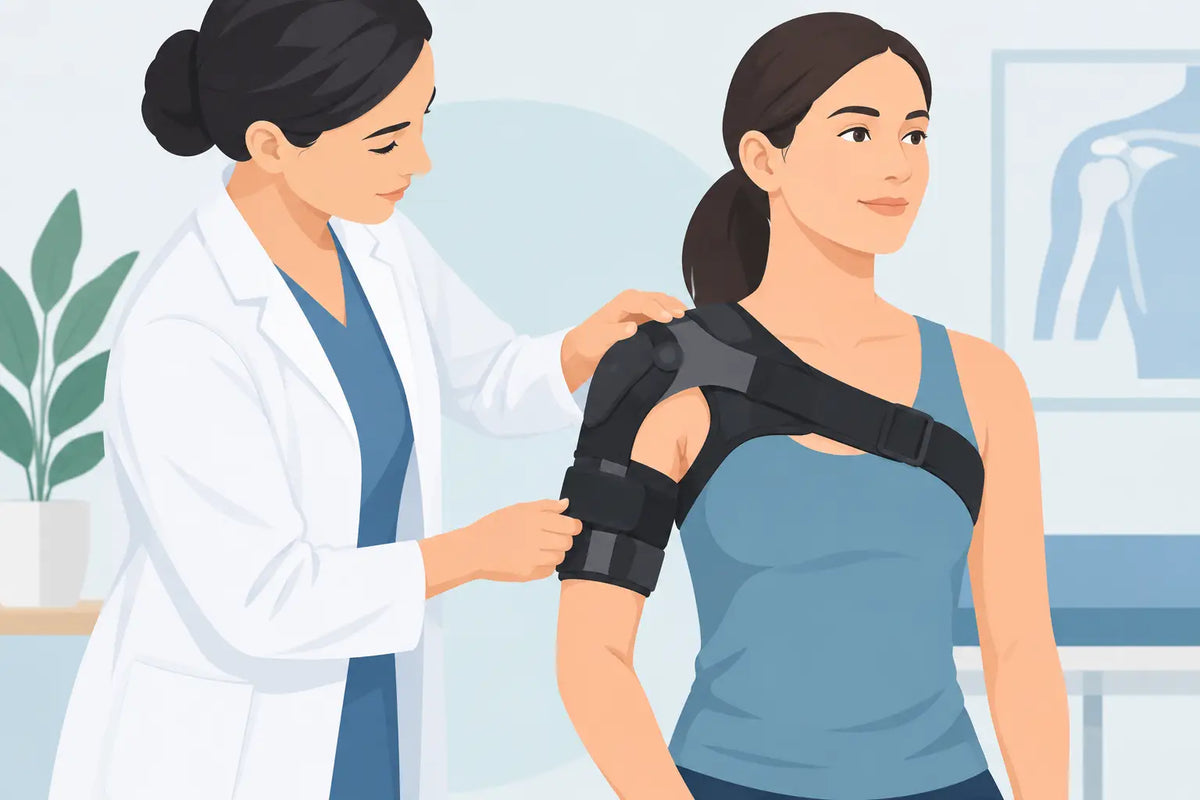
A shoulder orthosis should feel purposeful from the first fitting: supportive enough to limit the movement your clinician wants protected, but not so tight that it causes numbness, pressure pain, or restricted circulation. Knowing how to fit a shoulder orthosis correctly helps the brace do its intended job during recovery from injury, surgery, instability, or painful overuse.
The fitting instructions supplied with your specific brace always take priority. Shoulder orthoses vary significantly. A simple sling, an immobilizer with a waist belt, and a stabilizing brace for recurrent dislocation each control the arm and shoulder in different ways. If the orthosis was prescribed after surgery or for a fracture, follow the position, wearing schedule, and range-of-motion restrictions provided by your surgeon or treating practitioner.
Start with the correct size and support level
A well-fitted orthosis begins before you fasten a strap. Check the product's sizing chart and take measurements exactly where indicated, usually around the chest, upper arm, waist, or forearm. Use a flexible measuring tape held flat against the body without pulling it tight. If your measurement falls between sizes, do not assume that smaller means more supportive. The right choice depends on the brace design, your body shape, swelling, and the level of compression or immobilization required.
A shoulder support intended for mild instability or activity-related discomfort may allow more movement than an immobilizing orthosis used after trauma. Choosing a more restrictive device than your clinician recommends can stiffen the shoulder and interfere with rehabilitation. Conversely, a brace that is too flexible or too large may migrate, fail to control the arm, and place strain on the neck.
Try the orthosis over a thin, close-fitting shirt unless your clinician has instructed otherwise. A cotton or moisture-wicking layer can reduce friction and help protect sensitive skin, particularly when the device must be worn for long periods. Avoid thick seams, bulky collars, or loose fabric beneath straps, as these can create pressure points and affect fit.
How to fit a shoulder orthosis step by step
Whenever possible, fit the device while seated with your affected arm supported on a table, pillow, or your lap. This reduces the need to lift the arm before it is secured. If pain, weakness, or post-operative restrictions make self-fitting difficult, ask a family member, caregiver, or health practitioner to assist.
Position the arm before tightening straps
Place the forearm in the sling or support pocket first. The elbow should usually sit fully back in the deepest part of the pocket, not perched at the edge. For many shoulder immobilizers, the elbow is held at approximately 90 degrees and the hand rests slightly higher than the elbow. This can help manage swelling in the hand and forearm.
However, the prescribed position matters more than a general rule. Some surgical protocols require a specific degree of shoulder abduction or external rotation. Do not adjust cushions, wedges, or positioning components to a more comfortable angle unless your clinician confirms it is appropriate.
Make sure the wrist is supported without forcing it into an uncomfortable bend. The fingers should remain visible and able to move freely unless your medical team has advised otherwise. If the hand hangs below the sling opening, the sling is likely too large, incorrectly positioned, or insufficiently adjusted.
Adjust the shoulder strap without loading the neck
Bring the main shoulder strap across the back and over the opposite shoulder according to the product design. Secure it gradually, keeping the forearm level as you adjust. The strap should hold the elbow in position without allowing the arm to drop, yet it should not dig into the top of the shoulder or pull heavily on the neck.
A useful check is to stand upright and relax your shoulders. If you immediately feel yourself hiking one shoulder toward your ear, the strap may be too short, too narrow for the load it is carrying, or positioned incorrectly. Reposition any padded section so it sits over the upper shoulder rather than against the side of the neck.
Many modern orthoses use wide, adjustable straps and soft padding to distribute force more comfortably. These features work best when the straps lie flat. Twisted webbing can create concentrated pressure, especially after several hours of wear.
Secure the torso or waist strap
If your orthosis includes a waist or torso strap, wrap it around the body as directed and attach it without compressing the abdomen or restricting normal breathing. Its role is typically to keep the arm close to the body and reduce unwanted shoulder movement. It should feel firm, not constrictive.
You should be able to take a full, comfortable breath and sit without the strap rolling or pinching. If the strap rides upward toward the ribs, check whether the elbow is properly seated in the sling and whether the strap has been routed through the correct loops. A strap that is too loose may allow the arm to swing away from the torso, while one that is too tight can be uncomfortable during meals, driving as a passenger, or sleep.
Set secondary straps and stabilization components
Some shoulder orthoses include upper-arm straps, forearm straps, thumb loops, or straps that cross the chest and back. Fasten these after the arm and torso are in the intended position. They should prevent the brace from shifting without causing local pressure or rubbing.
For shoulder stabilization braces designed for instability, the straps may provide directional control rather than full immobilization. Follow the routing sequence in the supplied instructions closely. Reversing a strap or changing its tension can alter how the brace guides the shoulder.
Check fit after five to ten minutes
A shoulder orthosis can appear correct immediately after fitting but reveal problems once you begin walking, sitting, or using the unaffected arm. Wear it for a few minutes in a safe setting, then reassess the position.
The elbow should remain supported, the shoulder strap should stay away from the neck, and the torso strap should not roll or ride upward. The brace should not create sharp pressure over surgical incisions, prominent bones, or areas of bruising. Mild awareness of the support is expected. Increasing pain, tingling, burning, numbness, cold fingers, colour changes, or noticeable swelling are not normal fitting cues.
Remove or loosen the orthosis and contact your treating practitioner promptly if these symptoms do not resolve. A brace should never be tightened to the point of impaired circulation. Check the skin at least once daily, and more often if you have reduced sensation, diabetes, fragile skin, or significant swelling.
Make daily adjustments without compromising treatment
Straps often need small adjustments during the day. Swelling may increase after activity, while straps can loosen as materials settle or clothing shifts. Make changes one strap at a time so you can identify what improves comfort and what affects support.
Do not remove an immobilizing orthosis for showering, sleeping, exercise, or driving unless your care plan permits it. Many people are instructed to wear a shoulder support continuously in the early stages of recovery, removing it only for hygiene or approved exercises. Others need it only during activity. The correct schedule depends on the diagnosis and stage of healing.
If you need to dress, choose front-opening shirts and loose sleeves. Put the affected arm into the garment first, then apply the orthosis. When undressing, remove the orthosis as instructed and take the unaffected arm out first. This reduces twisting and accidental lifting at the shoulder.
When professional fitting is the better choice
Self-fitting can work well for a straightforward sling or a familiar support, but some situations deserve hands-on guidance. Seek professional help when the orthosis is prescribed after surgery, fracture, dislocation, or tendon repair; when there are positioning wedges or multiple stabilization straps; or when pain and weakness prevent you from applying it safely.
A physiotherapist, occupational therapist, orthopedic clinic, or trained product specialist can confirm that the device matches the treatment goal and teach you how to apply it consistently. This is particularly useful for caregivers supporting someone with limited mobility. For Canadian customers, retain the prescription, invoice, and product documentation if you plan to submit an insurance claim.
A quality shoulder orthosis is designed to support healing, movement control, and everyday function, not to be endured through discomfort. Take the extra few minutes to position the elbow, flatten the straps, and check your skin. A careful fit gives the shoulder the protection it needs while making recovery more manageable.

Leave a comment
This site is protected by hCaptcha and the hCaptcha Privacy Policy and Terms of Service apply.